
The regular .animate() function already provides a powerful way of animating views. Yet, its usage is limited to simple transformations. In this guide, I'm going to show how complex SwiftUI views can be animated efficiently using VectorArithmetic protocol with Accelerate library for fast computations.
Inspiration
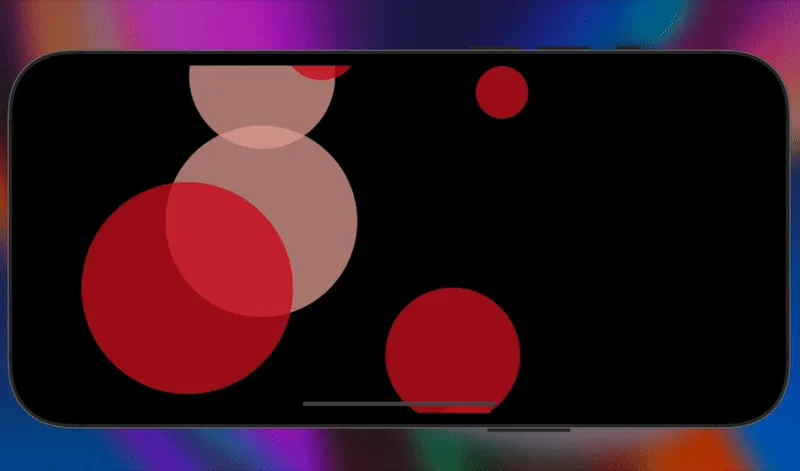
In the course of this guide, we will make a morphing sphere animation inspired by lava lamp bubbles. Some kind of wobbling lava bubbles.
Creating custom animations
You may think about animation as a transition between two states. And this transition must be smooth! To display this smooth transition, SwiftUI needs to know how to draw in-between stages.
AnimatableVector
The key idea of the animation is to represent objects' states with properties that can change continuously.
For example, if we try to animate an object's positioning and it has integer coordinates, then creating in-between frames of an object smoothly moving from one coordinate to the other is impossible. On the opposite, if the object's position is represented by a floating-point variable, then we can gradually change the object's coordinate until the new coordinate is achieved.
The same goes for more complicated animations. But usually, states cannot be represented by a single float variable. In this case, we are going to use AnimatableVector. It represents a mathematical vector, conforming to VectorArithmetic protocol.
VectorArithmetic protocol, then SwiftUI can compute in-between vectors and draw transitioning.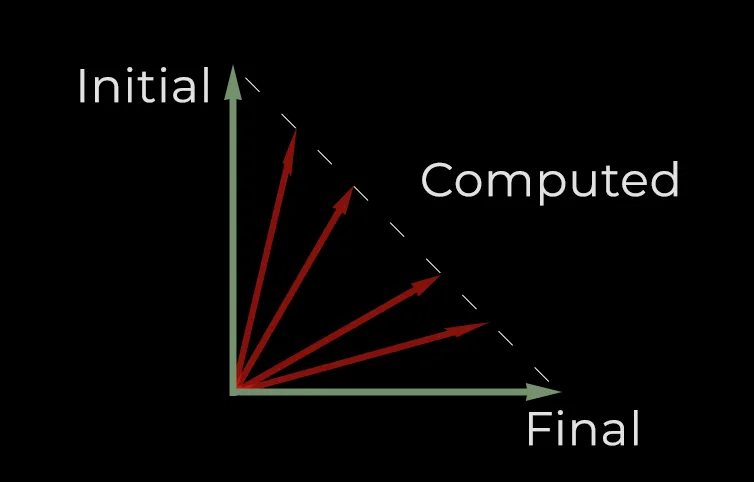
The AnimatableVector is pretty simple. We store an array of coordinates and define basic math operations for them. In the code below Accelerate is used for fast computations.
import enum Accelerate.vDSP

struct AnimatableVector: VectorArithmetic {
    var values: [Float]

    static var zero = AnimatableVector(values: [0.0])

    static func + (lhs: AnimatableVector, rhs: AnimatableVector) -> AnimatableVector {
        let count = min(lhs.values.count, rhs.values.count)
        return AnimatableVector(
            values: vDSP.add(
                lhs.values[0..<count],
                rhs.values[0..<count]
            )
        )
    }

    static func += (lhs: inout AnimatableVector, rhs: AnimatableVector) {
        let count = min(lhs.values.count, rhs.values.count)
        vDSP.add(
            lhs.values[0..<count],
            rhs.values[0..<count],
            result: &lhs.values[0..<count]
        )
    }

    static func - (lhs: AnimatableVector, rhs: AnimatableVector) -> AnimatableVector {
        let count = min(lhs.values.count, rhs.values.count)
        return AnimatableVector(
            values: vDSP.subtract(
                lhs.values[0..<count],
                rhs.values[0..<count]
            )
        )
    }

    static func -= (lhs: inout AnimatableVector, rhs: AnimatableVector) {
        let count = min(lhs.values.count, rhs.values.count)
        vDSP.subtract(
            lhs.values[0..<count],
            rhs.values[0..<count],
            result: &lhs.values[0..<count]
        )
    }

    mutating func scale(by rhs: Double) {
        vDSP.multiply(
            Float(rhs),
            values,
            result: &values
        )
    }

    var magnitudeSquared: Double {
        Double(
            vDSP.sum(
                vDSP.multiply(values, values)
            )
        )
    }

    var count: Int {
        values.count
    }

    subscript(_ i: Int) -> Float {
        get {
            values[i]
        } set {
            values[i] = newValue
        }
    }
}
Wobbling bubble
So, as I already said, we need to define stages of animation with AnimatableVector so that SwiftUI will be able to magically draw all in-between frames.
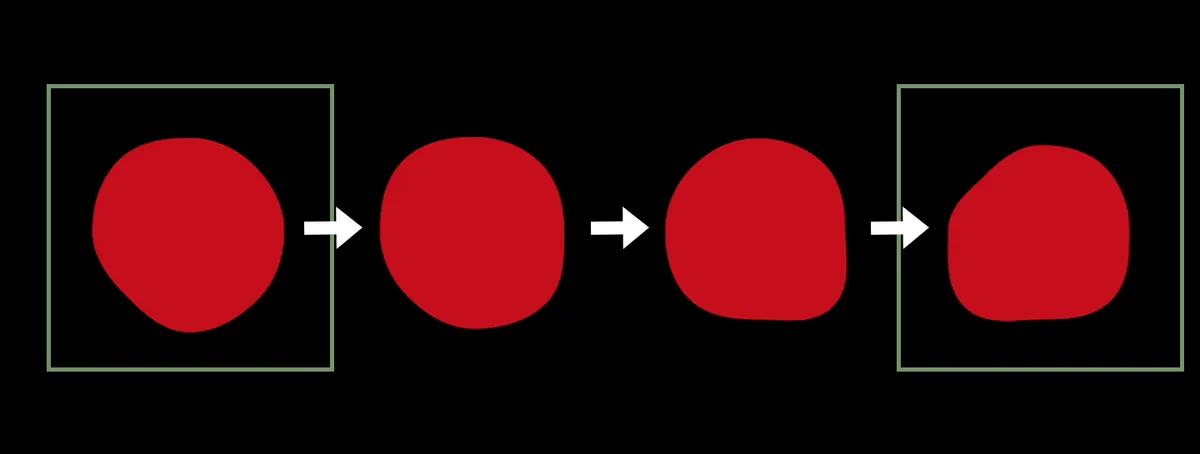
To do this with a circle, we first need to somehow make it able to wobble. This is done through approximation with curves. To make the morphing effect, we will use AnimatableVector to modify the radius at every specific point.
That's it
The first coordinate of the vector will say how much must be added to the distance of the first approximation point. The second is for the second point and so on.
You can see in a gif below how the radius at every specific point changes and how SwiftUI changes it smoothly. Curves' control points are also displayed.

Subscribe to Alex Dremov
Get an email every time I post something. No SPAM.
Implementation
The concept of animation is determined. It's time to code!
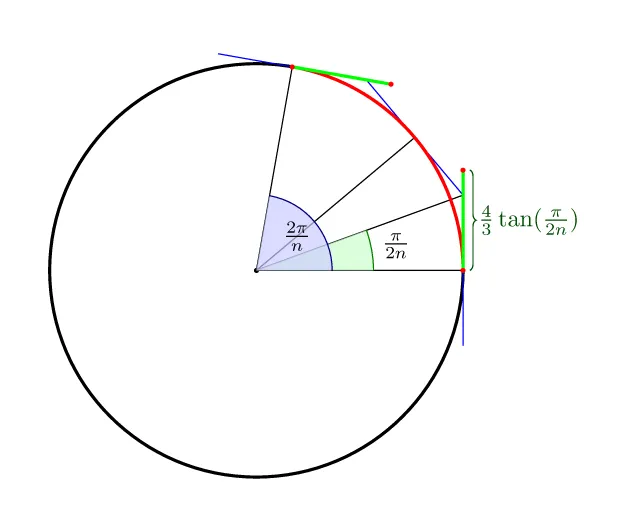
As I said, the main idea is to approximate a circle with curves. There is an approximation of control points: (4/3)*tan(pi/(2n)) distance from a point in a circle with n segments.
We're going to represent the circle as an object conforming to Shape protocol. For SwiftUI to know what to animate, you need to define animatableData property. That's what SwiftUI is going to use to animate in-between frames.
var animatableData: AnimatableVector {
    get { animatedValue }
    set { animatedValue = newValue }
}
A little bit of linear algebra and all point coordinates are calculated. Some more advanced operations on CGVector and CGPoint are needed:
import Foundation
import SwiftUI

extension CGPoint {
    public static func +(lhs: CGPoint, rhs: CGPoint) -> CGPoint {
        CGPoint(x: lhs.x + rhs.x, y: lhs.y + rhs.y)
    }

    static func +(lhs: CGPoint, rhs: CGVector) -> CGPoint {
        CGPoint(x: lhs.x + rhs.dx, y: lhs.y + rhs.dy)
    }

    static func -(lhs: CGPoint, rhs: CGVector) -> CGPoint {
        CGPoint(x: lhs.x - rhs.dx, y: lhs.y - rhs.dy)
    }

    public static func -(lhs: CGPoint, rhs: CGPoint) -> CGPoint {
        CGPoint(x: lhs.x - rhs.x, y: lhs.y - rhs.y)
    }

    init(_ vec: CGVector) {
        self = CGPoint(x: vec.dx, y: vec.dy)
    }
}

extension CGPoint: VectorArithmetic {
    public mutating func scale(by rhs: Double) {
        x = CGFloat(rhs) * x
        y = CGFloat(rhs) * y
    }

    public var magnitudeSquared: Double {
        Double(x * x + y * y)
    }


}

extension CGVector {
    init(_ point: CGPoint) {
        self = CGVector(dx: point.x, dy: point.y)
    }

    func scalar(_ vec: CGVector) -> CGFloat {
        dx * vec.dx + dy * vec.dy
    }

    func len() -> CGFloat {
        sqrt(dx * dx + dy * dy)
    }

    func perpendicular() -> CGVector {
        CGVector(dx: -dy, dy: dx) / len()
    }

    static func *(lhs: CGVector, rhs: CGFloat) -> CGVector {
        CGVector(dx: lhs.dx * rhs, dy: lhs.dy * rhs)
    }

    static func *(lhs: CGFloat, rhs: CGVector) -> CGVector {
        CGVector(dx: rhs.dx * lhs, dy: rhs.dy * lhs)
    }

    static func /(lhs: CGVector, rhs: CGFloat) -> CGVector {
        CGVector(dx: lhs.dx / rhs, dy: lhs.dy / rhs)
    }

    static func -(lhs: CGVector, rhs: CGVector) -> CGVector {
        CGVector(dx: lhs.dx - rhs.dx, dy: lhs.dy - rhs.dy)
    }

    static func +(lhs: CGVector, rhs: CGVector) -> CGVector {
        CGVector(dx: lhs.dx + rhs.dx, dy: lhs.dy + rhs.dy)
    }

    func angle(_ rhs: CGVector) -> CGFloat {
        return acos(scalar(rhs) / (rhs.len() * len()))
    }
}
Finally, implementing Shape:
import SwiftUI
import Foundation

struct MorphingCircleShape: Shape {
    let pointsNum: Int
    var morphing: AnimatableVector
    let tangentCoeficient: CGFloat

    var animatableData: AnimatableVector {
        get { morphing }
        set { morphing = newValue }
    }

    // Calculates control points
    func getTwoTangent(center: CGPoint, point: CGPoint) -> (first: CGPoint, second: CGPoint) {
        let a = CGVector(center - point)
        let dir = a.perpendicular() * a.len() * tangentCoeficient
        return (point - dir, point + dir)
    }

    // Draw circle
    func path(in rect: CGRect) -> Path {
        var path = Path()
        let radius = min(rect.width / 2, rect.height / 2)
        let center =  CGPoint(x: rect.width / 2, y: rect.height / 2)
        var nextPoint = CGPoint.zero

        let ithPoint: (Int) -> CGPoint = { i in
            let point = center + CGPoint(x: radius * sin(CGFloat(i) * CGFloat.pi * CGFloat(2) / CGFloat(pointsNum)),
                                         y: radius * cos(CGFloat(i) * CGFloat.pi * CGFloat(2) / CGFloat(pointsNum)))
            var direction = CGVector(point - center)
            direction = direction / direction.len()
            return point + direction * CGFloat(morphing[i >= pointsNum ? 0 : i])
        }
        var tangentLast = getTwoTangent(center: center,
                                        point: ithPoint(pointsNum - 1))
        for i in (0...pointsNum){
            nextPoint = ithPoint(i)
            let tangentNow = getTwoTangent(center: center, point: nextPoint)
            if i != 0 {
                path.addCurve(to: nextPoint, control1: tangentLast.1, control2: tangentNow.0)
            } else {
                path.move(to: nextPoint)
            }
            tangentLast = tangentNow
        }

        path.closeSubpath()
        return path
    }


    init(_ morph: AnimatableVector) {
        pointsNum = morph.count
        morphing = morph
        tangentCoeficient = (4 / 3) * tan(CGFloat.pi / CGFloat(2 * pointsNum))
    }
}
Finally, we can use this shape in a View. To make a wobbling effect, we need to change the vector responsible for radius modification.
This can be done by timer.
Using Timer
We're going to randomly change the morphing vector in the timer's callback. Also, it looks weird to change all points at once, so we're going to animate only a subset of them.
struct MorphingCircle: View & Identifiable & Hashable {
static func == (lhs: MorphingCircle, rhs: MorphingCircle) -> Bool {
lhs.id == rhs.id
}
func hash(into hasher: inout Hasher) {
hasher.combine(id)
}
let id = UUID()
@State var morph: AnimatableVector = AnimatableVector.zero
@State var timer: Timer?
func morphCreator() -> AnimatableVector {
let range = Float(-morphingRange)...Float(morphingRange)
var morphing = Array.init(repeating: Float.zero, count: self.points)
for i in 0..<morphing.count where Int.random(in: 0...1) == 0 {
morphing[i] = Float.random(in: range)
}
return AnimatableVector(values: morphing)
}
func update() {
morph = morphCreator()
}
let duration: Double
let points: Int
let secting: Double
let size: CGFloat
let outerSize: CGFloat
var color: Color
let morphingRange: CGFloat
var radius: CGFloat {
outerSize / 2
}
var body: some View {
MorphingCircleShape(morph)
.fill(color)
.frame(width: size, height: size, alignment: .center)
.animation(Animation.easeInOut(duration: Double(duration + 1.0)), value: morph)
.onAppear {
update()
timer = Timer.scheduledTimer(withTimeInterval: duration / secting, repeats: true) { timer in
update()
}
}.onDisappear {
timer?.invalidate()
}
.frame(width: outerSize, height: outerSize, alignment: .center)
.animation(nil, value: morph)
}
init(_ size:CGFloat = 300, morphingRange: CGFloat = 30, color: Color = .red, points: Int = 4, duration: Double = 5.0, secting: Double = 2) {
self.points = points
self.color = color
self.morphingRange = morphingRange
self.duration = duration
self.secting = secting
self.size = morphingRange * 2 < size ? size - morphingRange * 2 : 5
self.outerSize = size
morph = AnimatableVector(values: [])
update()
}
func color(_ newColor: Color) -> MorphingCircle {
var morphNew = self
morphNew.color = newColor
return morphNew
}
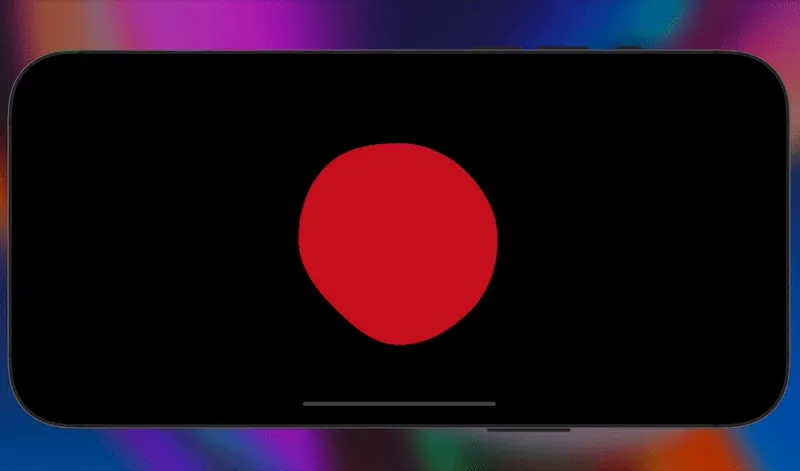
}Results
Created bubbles can be combined and animated to drift around the screen for example. Also, in the course of this guide, we created AnimatableVector structure that you can use in your projects.
Feel free to share your results!
References
- https://stackoverflow.com/questions/1734745/how-to-create-circle-with-bézier-curves
- https://developer.apple.com/documentation/swiftui/animatable/animatabledata-swift.property-6nydg