Tuist is an excellent command line tool that helps you generate, maintain and interact with Xcode projects.

What’s next?
In the next and last post in this series, I will cover implementation tips with SwiftUI. Subscribe so you don’t miss it
UPD: now available

Why Tuist?
It encourages you to further code modularization as it provides an elegant way to create separate Xcode projects for different modules, making tight coupling or implicit dependencies less viable
Also, it's great for teamwork. Have you tried to commit an Xcode project to a VCS like GitHub?
It's a mess
Diff of the modified Xcode project is not human-readable. It's simply impossible to trace changes or review a PR. What if you could define the Xcode project in a simple config file? Tuist does that. Moreover, tuist config files are written in Swift.
Our goal
We want to divide our project into separate Xcode projects according to the architecture I proposed in the previous article.
To reiterate, our app will consist of a combination of modules and for every module or feature, we will create a new Tuist project.
So, for each feature, we will create several targets corresponding to the feature interface, implementation, and testing or mocking targets if required.
Defining project
Structure
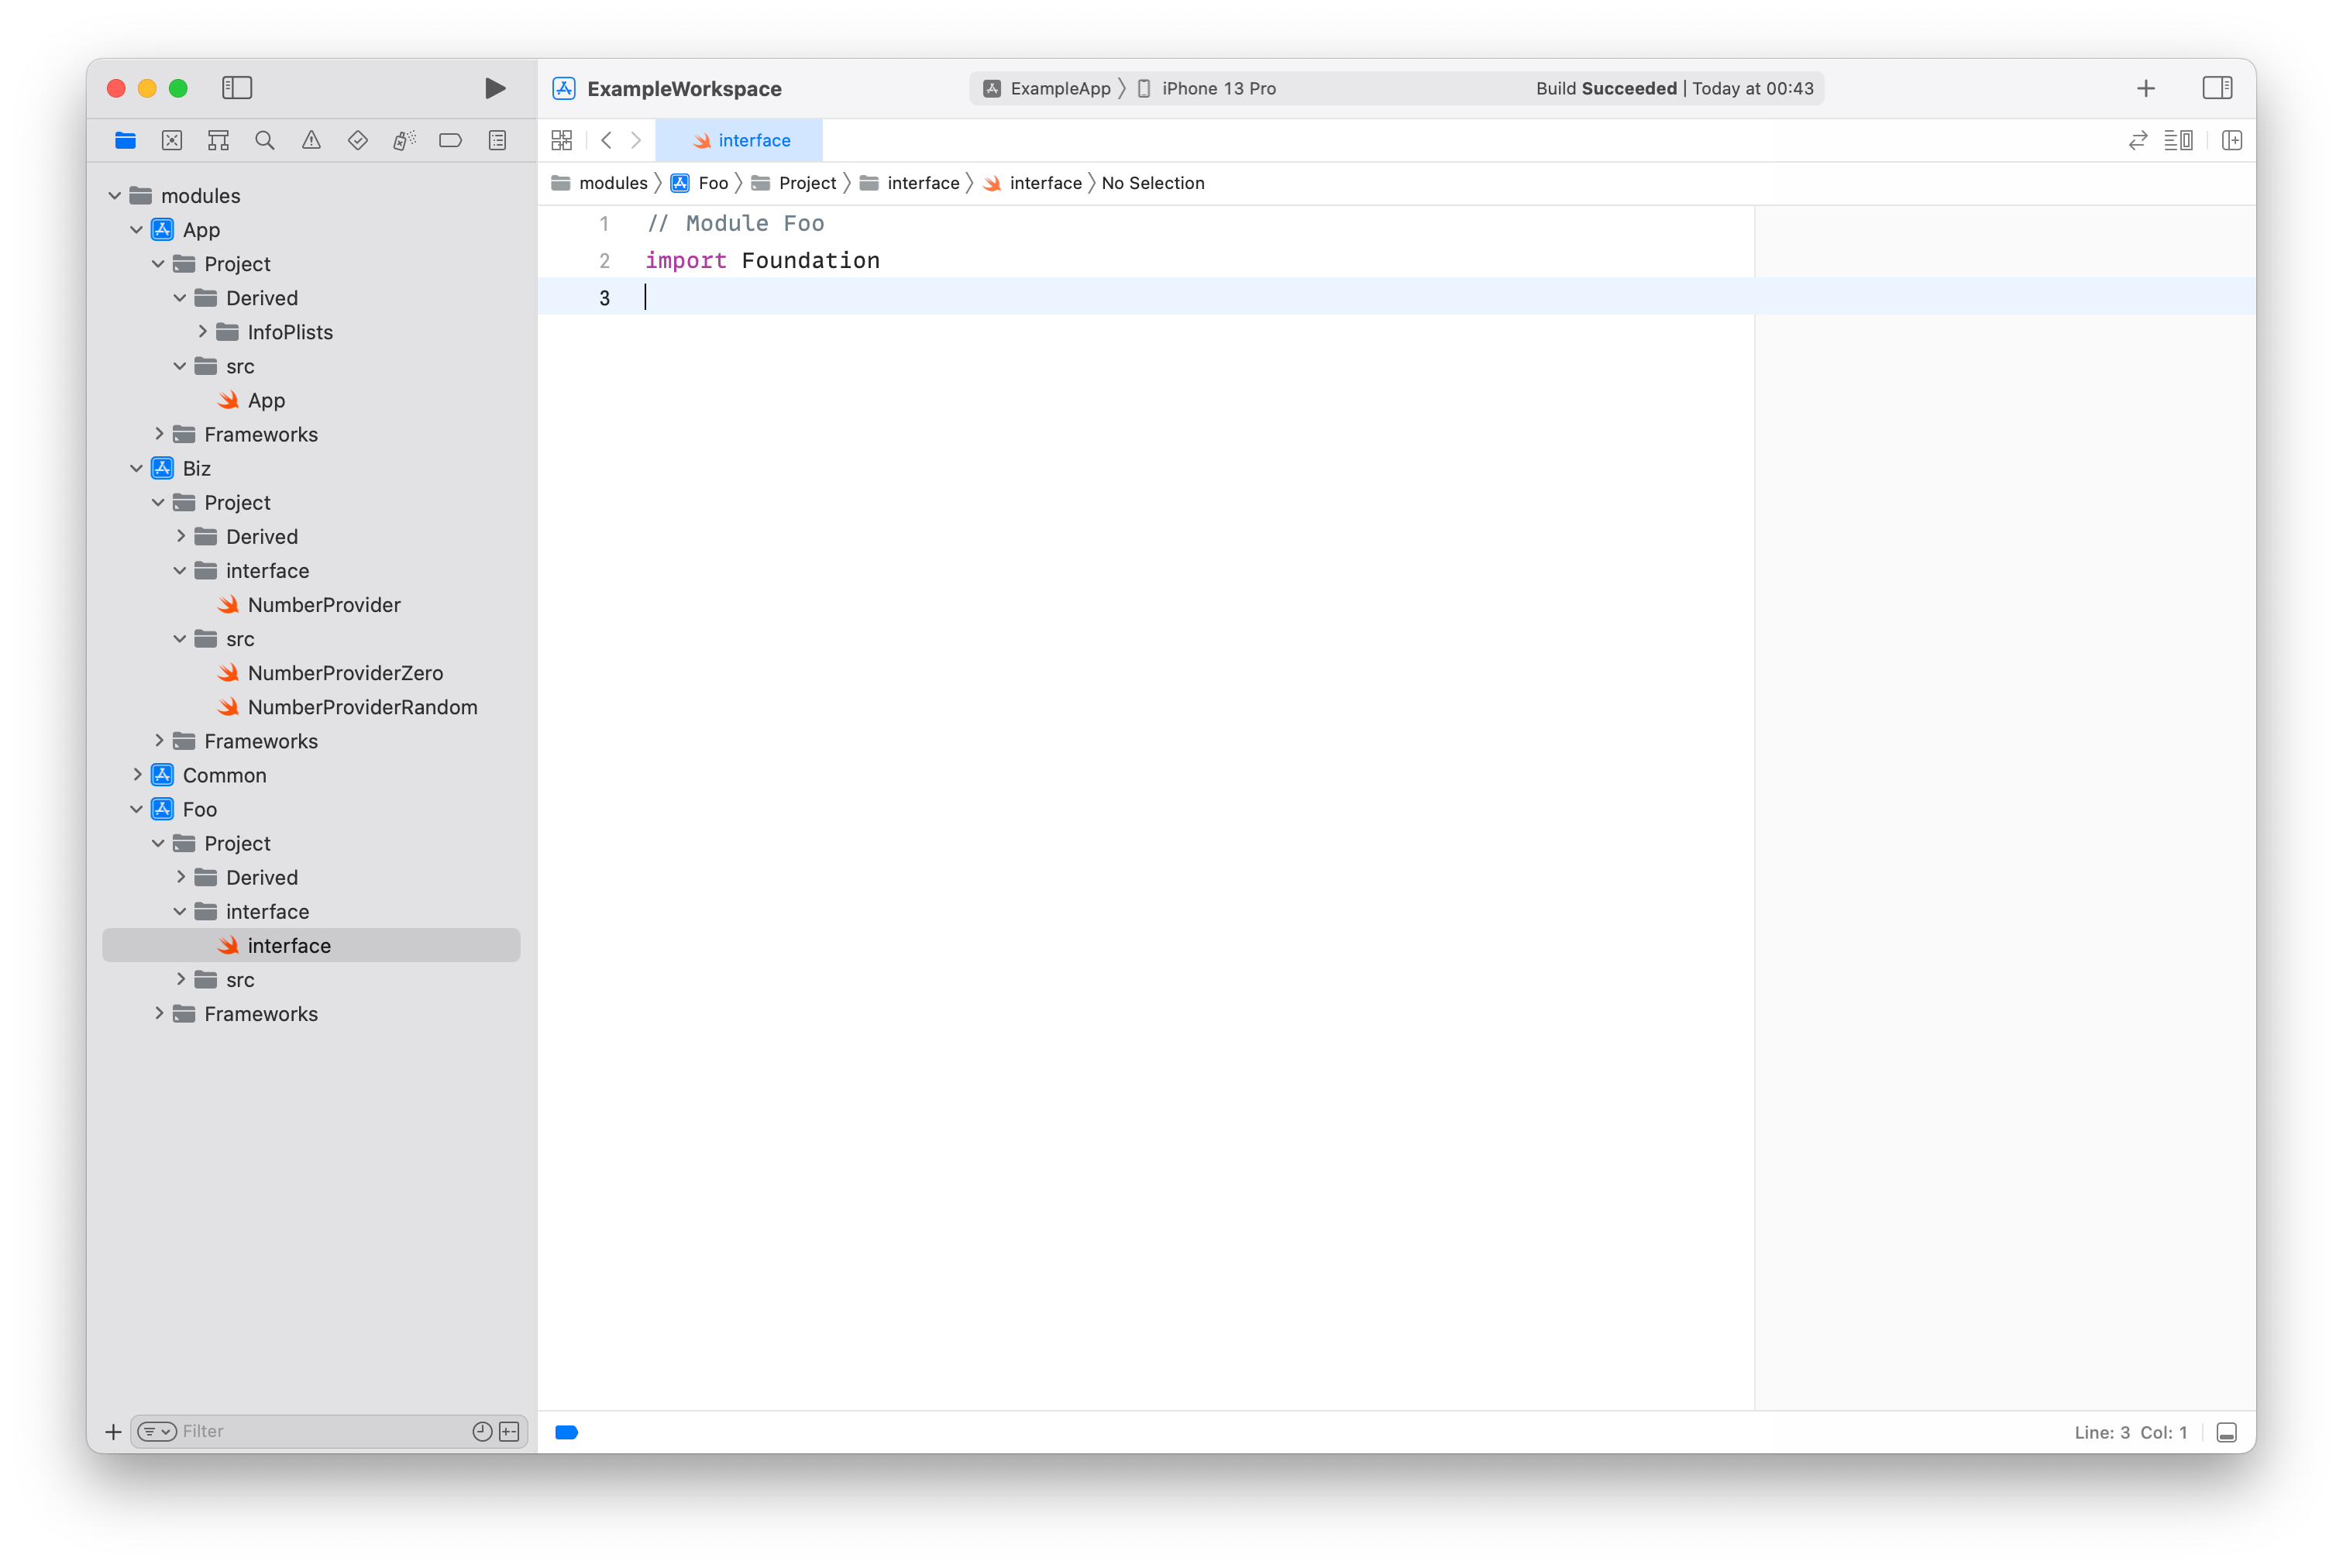
Tuist project is a simple folder with config files describing your workspace structure
Your project root
├── Workspace.swift
├── Tuist
│   ├── Config.swift
│   ├── Dependencies.swift
│   └── ProjectDescriptionHelpers
│       └── <tuist helpers>
└── modules
    ├── Foo
    │   ├── Project.swift
    │   └── <module code, folders>
    ├── Biz
    │   ├── Project.swift
    │   └── <module code, folders>
    └── ...
But as I said early, each module should have at least an implementation and interface target
So, let's modify the structure according to that
Your project root
├── Workspace.swift
├── Tuist
│   ├── Config.swift
│   ├── Dependencies.swift
│   └── ProjectDescriptionHelpers
│       └── <tuist helpers>
└── modules
    ├── Foo
    │   └── Project.swift
    │       ├── interface
    │       │   └── <interface files>
    │       └── src
    │           └── <implementation files>
    ├── Biz
    │   └── Project.swift
    │       ├── interface
    │       │   └── <interface files>
    │       └── src
    │           └── <implementation files>
    └── ...
Before defining modules, we need to define where Tuist should search for these modules. This can be done in Workspace.swift file
import ProjectDescription

let workspace = Workspace(
    name: "ExampleWorkspace",
    projects: [
        "modules/*"
    ]
)
Project file
Tuist defines the Xcode project with a simple Swift file.
// Project.swift
import ProjectDescription
import ProjectDescriptionHelpers

let project = Project(
  name: "ProjectName",
  targets: [
  	...
  ]
)
But this post is not just a review of Tuist
Let's define a project, knowing that we need to have an interface and implementation targets. Also, let's create an enum for feature names so that we don't have to use strings and remember all namings
For example, Xcode will suggest other modules' names when using enums
With several simple helpers, we could define project structure with Swift's beauty:
import ProjectDescription
import ProjectDescriptionHelpers

let project = Project(
    name: Feature.Foo.rawValue,
    targets: [
        .feature(
            implementation: .Foo,
            dependencies: [
                .feature(interface: .Biz),
                .external(.AsyncAlgorithms)
            ]
        ),
        .feature(
            interface: .Foo,
            dependencies: [
                .feature(interface: .Biz)
            ]
        )
    ]
)
Features are going to be separate frameworks.
swift files that help to describe tuist configs should be placed in the ProjectDescriptionHelpers folderpublic extension Target {
static func makeFramework(
name: String,
sources: ProjectDescription.SourceFilesList,
dependencies: [ProjectDescription.TargetDependency] = [],
resources: ProjectDescription.ResourceFileElements? = []
) -> Target {
Target(
name: name,
platform: .iOS,
product: defaultPackageType,
bundleId: makeBundleID(with: name + ".framework"),
sources: sources,
resources: resources,
dependencies: dependencies
)
}
}Then, we can define what feature is
public extension Target {
    static func feature(
        interface featureName: Feature,
        dependencies: [ProjectDescription.TargetDependency] = [],
        resources: ProjectDescription.ResourceFileElements? = []
    ) -> Target {
        .makeFramework(
            name: featureName.rawValue + "Interface",
            sources: [ "interface/**" ],
            dependencies: dependencies,
            resources: resources
        )
    }

    static func feature(
        interface featureName: Feature,
        dependencies: [ProjectDescription.TargetDependency] = [],
        resources: ProjectDescription.ResourceFileElements? = []
    ) -> Target {
        .makeFramework(
            name: featureName.rawValue,
            sources: [ "src/**" ],
            dependencies: dependencies,
            resources: resources
        )
    }
}
Finally, we combine modules in an app target. It's defined in the same way
public extension Target {
    static func makeApp(
        name: String,
        sources: ProjectDescription.SourceFilesList,
        dependencies: [ProjectDescription.TargetDependency]
    ) -> Target {
        Target(
            name: name,
            platform: .iOS,
            product: .app,
            bundleId: makeBundleID(with: "app"),
            deploymentTarget: .iOS(targetVersion: "16.0", devices: .iphone),
            sources: sources,
            dependencies: dependencies
        )
    }
}

let project = Project(
    name: "ExampleApp",
    targets: [
        .makeApp(
            name: "ExampleApp",
            sources: [
                "src/**"
            ],
            dependencies: [
                .common,
                .feature(implementation: .Foo),
                .feature(interface: .Foo),

                .feature(implementation: .Biz),
                .feature(interface: .Biz),

                .external(.FoggyColors)
            ]
        )
    ]
)
That's it.
Now we can create different features and state dependencies between them. After that, we simply use tuist generate command and it generates Xcode workspace and Xcode projects for us.

Great!
Now we have our project bootstrapped, and it is fully defined in nice Swift files with a clean structure and explicit dependencies. You can add all .xcodeproj and .xcworkspace to gitignore and forget about a mess in GitHub repositories.
Creating an app with Tuist
I already showed how to define project structure in the examples above. Let's get even more specific and write a simple app that will show a random value in a range.

RandomProvider defines a protocol for generating a random number and several implementations for it
// Interface
public protocol NumberProvider {
    var number: Int { get }
}

// Implementation
public struct NumberProviderZero: NumberProvider {
    public let number = 0

    public init() {

    }
}

public struct NumberProviderRandom: NumberProvider {
    private let range: ClosedRange<Int>

    public var number: Int {
        Int.random(in: range)
    }

    public init(range: ClosedRange<Int>) {
        self.range = range
    }
}
RandomScreen defines several UI screens to display random number and re-generate it. Notice that it depends only on RandomProviderInterface and not on RandomProvider which is the implementation
public struct RandomScreenSimple: RandomScreen {
    let randomProvider: NumberProvider

    @State var number: Int = 0

    public init(randomProvider: NumberProvider) {
        self.randomProvider = randomProvider
    }

    public var body: some View {
        VStack {
            Text("\(number)")
            Button("generate") {
                number = randomProvider.number
            }
        }.onAppear {
            number = randomProvider.number
        }
        .animation(.default, value: number)
    }
}
Common is a module that provides common tools. Actually, it is used only by the App module, but I wanted to show that many modules can depend on it
ExampleApp is an app module that combines other modules and builds the final app
This is the only module that can depend on other modules' implementation. Moreover, it chooses which implementation to use depending on the scenario. In the example app, NumberProvider implementation is changed in runtime
Final notes
So, in this post, we constructed a modular app using Tuist. In the example project, I added useful tools like
- Additions to default Info.plist
- Template for creating a new feature that can be invoked by
tuist scaffold framework --name ModuleName. This will create a new module folder, Project.swift file - Building for release mode. You can invoke generation with an environment variable and this will make all modules static. Using static frameworks improves app speed and is good for production.
TUIST_BUILD_TYPE_RELEASE=TRUE tuist generate --no-cache
Also, If you have not read my article on a general overview of modular architecture, check it out!

Do not hesitate to ask anything in the comments
References


