Apple introduces a new SwiftUI Layout protocol with the release of iOS 16. It is a powerful tool for constructing custom views with SwiftUI elegance. In this post, I will cover what Layout is and how it can be used.
In the end, we will construct a custom table view that auto-arranges its subviews. Complete code is provided!
Conforming to Layout
The discussed Layout is a new protocol that allows you to select a way of arranging your views.
Through it, you literally can say at what coordinates you want to place subviews. For example, now HStack, VStack, and ZStack can easily be implemented through it in iOS 16.
protocol Layout : AnimatableTo conform to the protocol, you need to define two methods
func sizeThatFits(
    proposal: ProposedViewSize,
    subviews: Self.Subviews,
    cache: inout Self.Cache
) -> CGSize


func placeSubviews(
    in bounds: CGRect,
    proposal: ProposedViewSize,
    subviews: Self.Subviews,
    cache: inout Self.Cache
)
You also can define makeCache(subviews:) if your layout has some calculations that do not depend on a proposal and depend only on subviews. Then, you can make your calculations in makeCache(subviews:) and then use these values.
Method sizeThatFits
func sizeThatFits(
    proposal: ProposedViewSize,
    subviews: Self.Subviews,
    cache: inout Self.Cache
) -> CGSize
Returns a size that indicates how much space the container needs to arrange its subviews. SwiftUI can call this method several times, probing your view and finally deciding the best option
To calculate it, you can use passed arguments:
proposal
Basically, it's SwiftUI's proposal for your view's size. I like to think about it as a negotiation.
I can give you this much space. What's your size is going to be? Will you even fit?
— SwiftUI negotiator
ProposedViewSize is like a CGSize that also can have some specific values.
- The
zeroproposal; the view responds with its minimum size. - The
infinityproposal; the view responds with its maximum size. - The
unspecifiedproposal; the view responds with its ideal size.
You can also access width and height of proposal if it is not of the above values.
The proposal can have one dimension fixed and the second one as nil. For example, an HStack might measure the flexibility of its subviews’ widths, while using a fixed value for the height.
subviews
It is just a container of subviews' proxies LayoutSubview. Through it, you can ask subviews about their size, and also give them your proposal
Dear subview, I give you this much space. What's your size is going to be?
— Custom Layout negotiator
You can ask for subview size through
func sizeThatFits(ProposedViewSize) -> CGSize
and
func dimensions(in: ProposedViewSize) -> ViewDimensions
cache
It is a cache provided by your makeCache(subviews:) function. It also can be Void (no cache).
Method placeSubviews
func placeSubviews(
    in bounds: CGRect,
    proposal: ProposedViewSize,
    subviews: Self.Subviews,
    cache: inout Self.Cache
)
It's where the magic happens. In this method (and only this) you are given bounds for your view and subviews for your disposal.
To place subviews, you need to call place method on subviews elements.
func place(
    at position: CGPoint,
    anchor: UnitPoint = .topLeading,
    proposal: ProposedViewSize
)
The definition is pretty self-explanatory. For every subview, you need to specify a point to place it, an anchor for this point, and your proposal for the selected subview.
bounds
It's bounds for your view to use. It is one of your sizeThatFits outputs.
bounds, it is actually frame. So, the origin point is also specified and you need to arrange subviews with respect to thatproposal
The size proposal from which the container generated the size that the parent used to create the bounds parameter.
About caching
You may not use it, but usually, some subviews-concerned calculations can be cached which is a good practice and great for performance.
When subviews are changed, func updateCache(inout Self.Cache, subviews: Self.Subviews) is called. Its default implementation is just to call makeCache(subviews:).
Creating auto-filled table
SwiftUI has a Grid to construct table-like structures, but what if you have an unknown number of subviews? Then, you need to construct GridRow somehow correctly.
Let's better use the new Layout protocol feature!
Calculating sizes
Deciding what size the result view will have is relatively simple.
public func sizeThatFits(
        proposal: ProposedViewSize,
        subviews: Subviews,
        cache: inout ()
    ) -> CGSize {

        let subviewProposal = getSubviewProposal(
            subviewsCount: subviews.count,
            from: proposal
        )

        let rowHeights = getRowHeights(
        	subviews: subviews,
            globalProposal: proposal
        )

        let resultWidth = proposal.width ??
        		((subviewProposal.width ?? 0) * CGFloat(columnsNumber))
        return CGSize(
            width: resultWidth,
            height: rowHeights.reduce(0, +)
        )
    }
It uses several helper-functions
/**
 Get array of heights for every row.
 Just get max height on every row
 */
private func getRowHeights(subviews: Subviews, subviewProposal: ProposedViewSize) -> [CGFloat] {
    var subviewProposalNoHLimit = subviewProposal
    subviewProposalNoHLimit.height = .infinity

    var rowHeights = [CGFloat]()
    var index = 0
    while index < subviews.count {
        var rowMax: CGFloat = 0
        for _ in 0..<columnsNumber where index < subviews.count {
            let size = subviews[index].sizeThatFits(subviewProposalNoHLimit)
            rowMax = max(rowMax, size.height)
            index += 1
        }
        rowHeights.append(rowMax)
    }
    return rowHeights
}

/**
 Calculates proposal for subview — one cell in table
 */
func getSubviewProposal(subviewsCount: Int, from globalProposal: ProposedViewSize) -> ProposedViewSize {
    let rowHeight = max(ceil(Double(subviewsCount / columnsNumber)), 1)
    return ProposedViewSize(
        width: (globalProposal.width ?? 0)
                        / CGFloat(columnsNumber),
        height: (globalProposal.height ?? 0) / rowHeight
    )
}
Placing subviews
Finally, we just need to carefully place views on their places. Just iterating over subviews and calculating their x and y position.
public func placeSubviews(
    in bounds: CGRect,
    proposal: ProposedViewSize,
    subviews: Subviews,
    cache: inout ()
) {
    var subviewProposal = getSubviewProposal(
        subviewsCount: subviews.count,
        from: proposal
    )
    let colRealWidth = subviewProposal.width ?? 0
    let rowHeights = getRowHeights(subviews: subviews, subviewProposal: subviewProposal)

    var curPos: CGFloat = bounds.minX
    var curHeight: CGFloat = bounds.minY

    var rowIndex = 0
    for (index, subview) in subviews.enumerated() {
        subviewProposal.height = rowHeights[rowIndex]
        let size = subview.dimensions(in: subviewProposal)

        subview.place(
            at: CGPoint(x: curPos, y: curHeight),
            anchor: .topLeading,
            proposal: subviewProposal
        )

        if index % columnsNumber == columnsNumber - 1 {
            curPos = bounds.minX
            curHeight += rowHeights[rowIndex]
            rowIndex += 1
        } else {
        	curPos += colRealWidth
        }
    }
}
Example
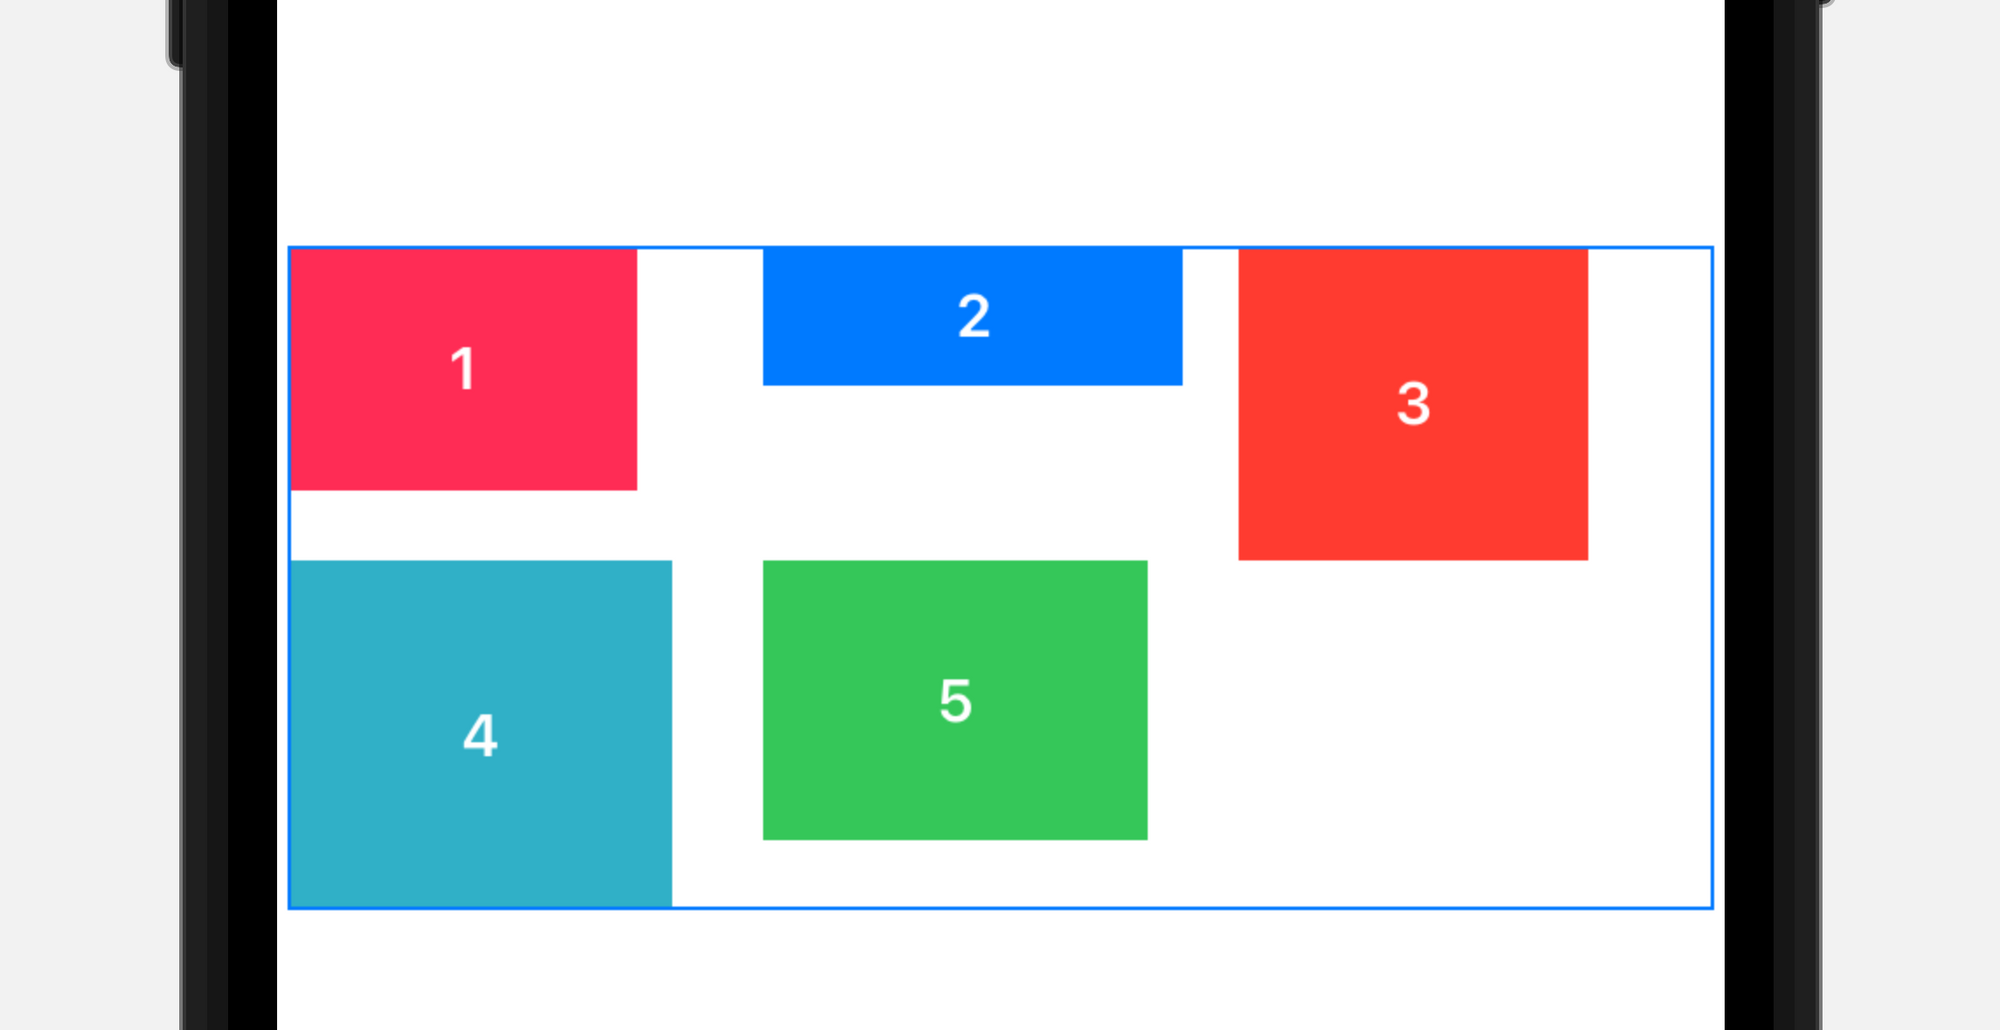
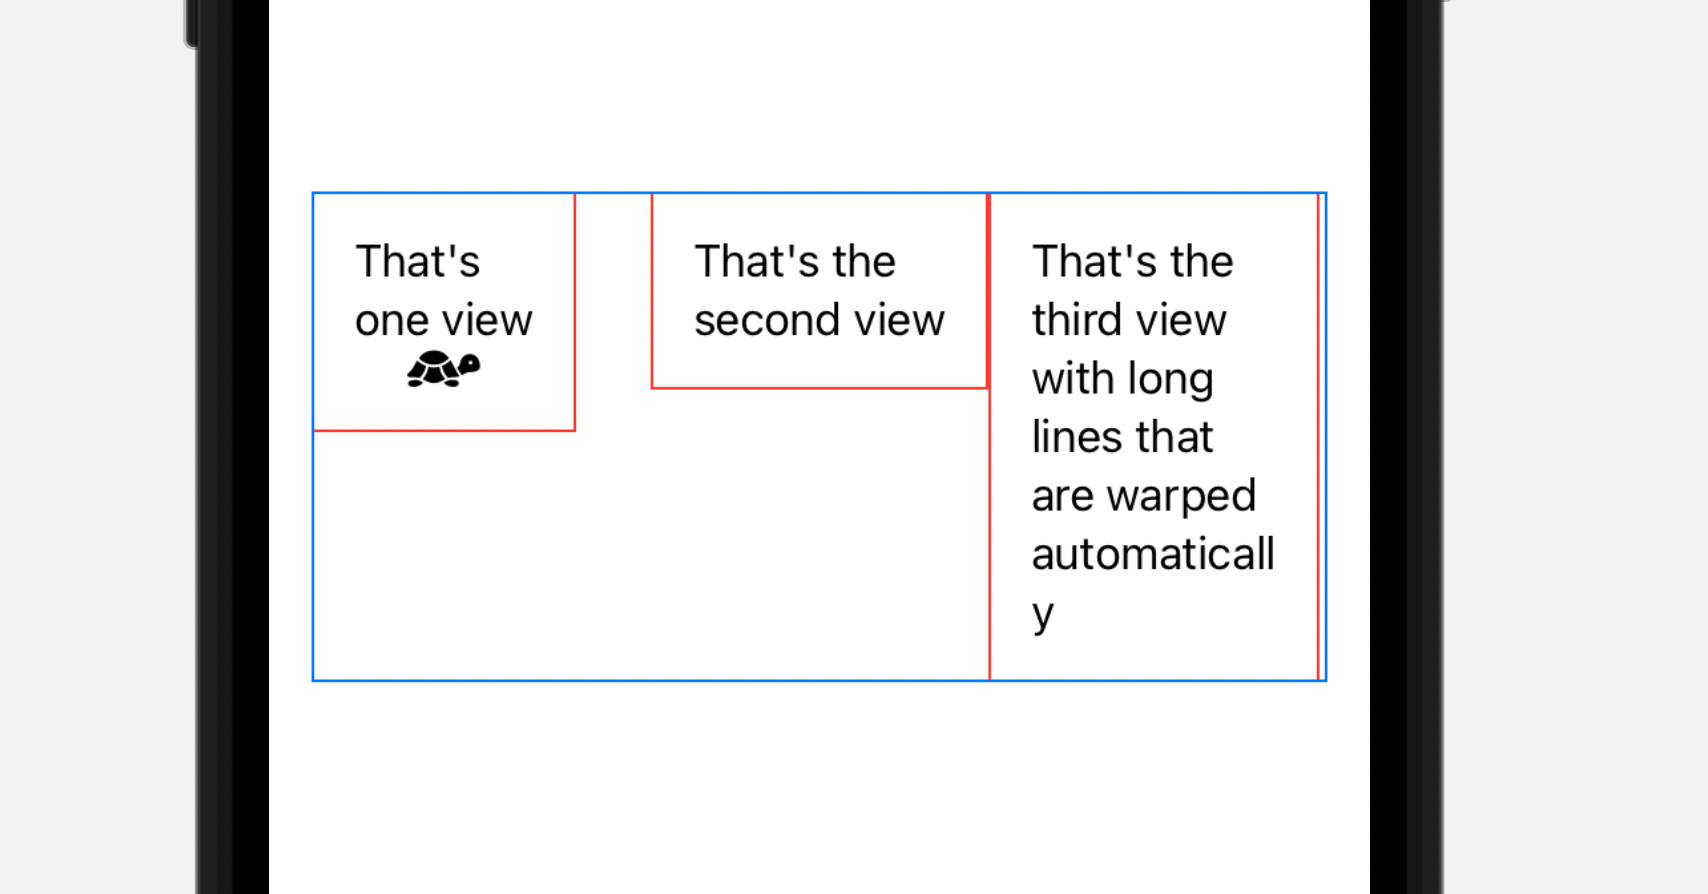
Now, we can construct a table with the needed number of columns as easy as just a regular view.
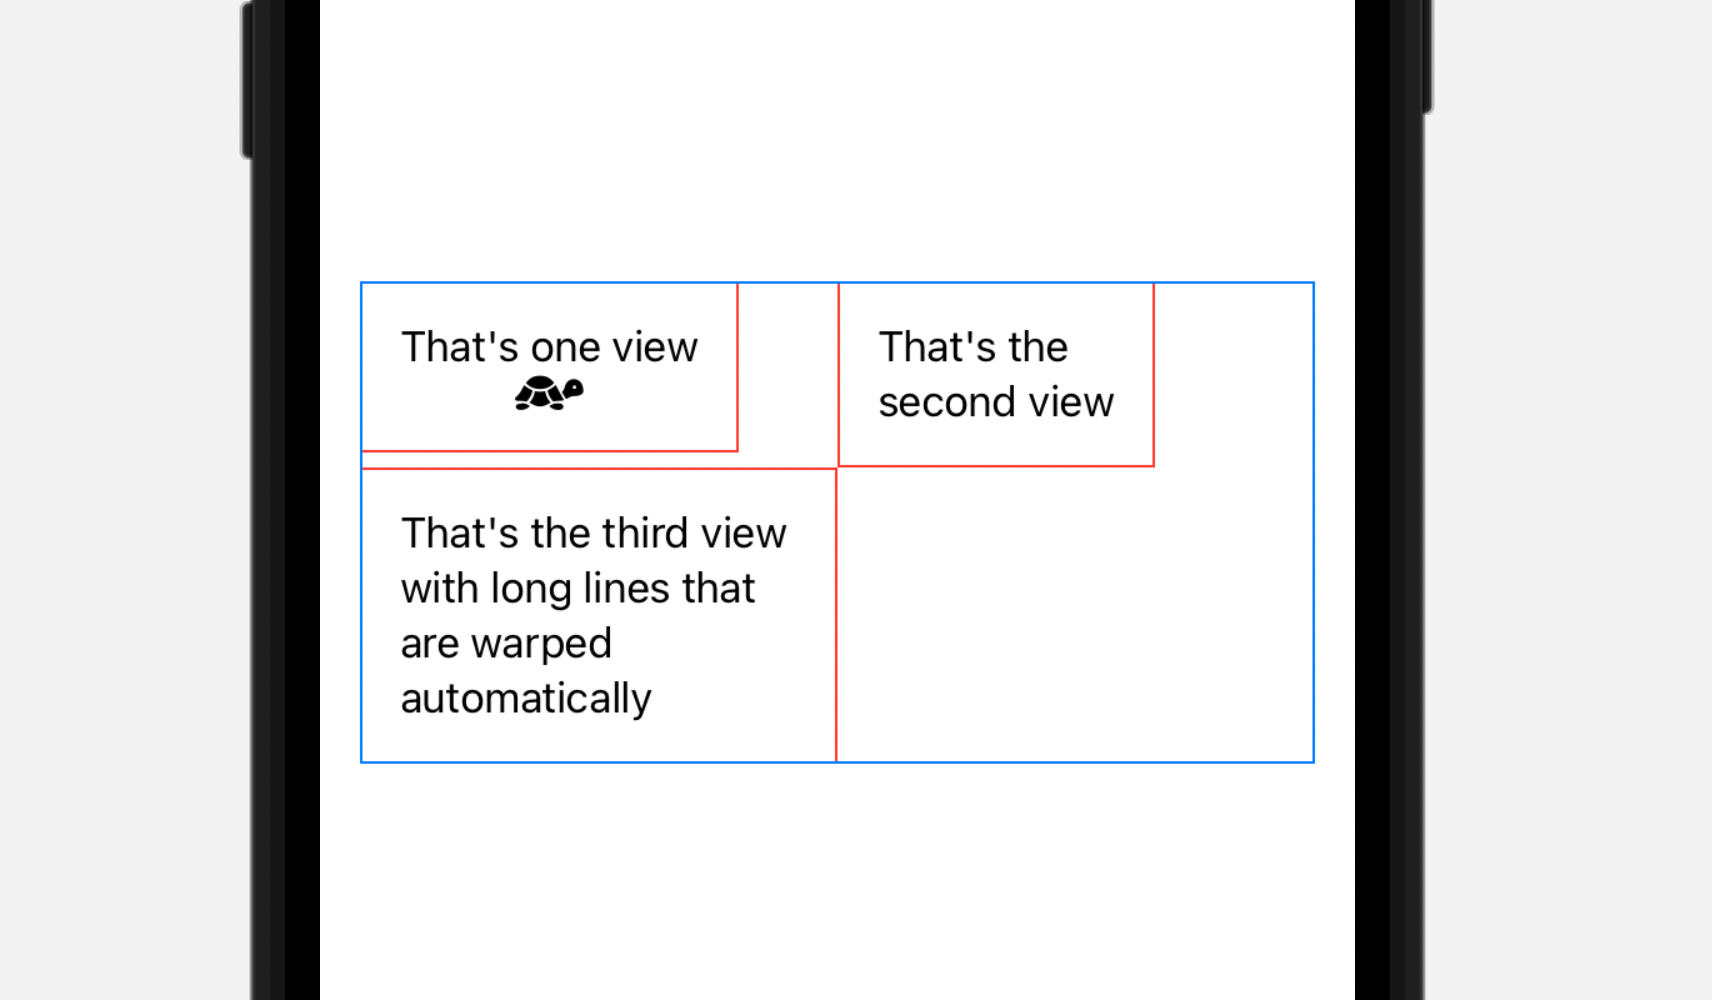
ColumnsLayout(columnsNumber: 2) {
    VStack {
        Text("That's one view")
        Image(systemName: "tortoise.fill")
    }
    .padding()
    .border(.red)
    Text("That's the second view ")
        .padding()
        .border(.red)
    Text("That's the third view with long lines that are warped automatically")
        .fixedSize(horizontal: false, vertical: true)
        .padding()
        .border(.red)
}
.border(.blue)
.padding()
And it magically re-assembles after changing the number of columns to three.
Final notes
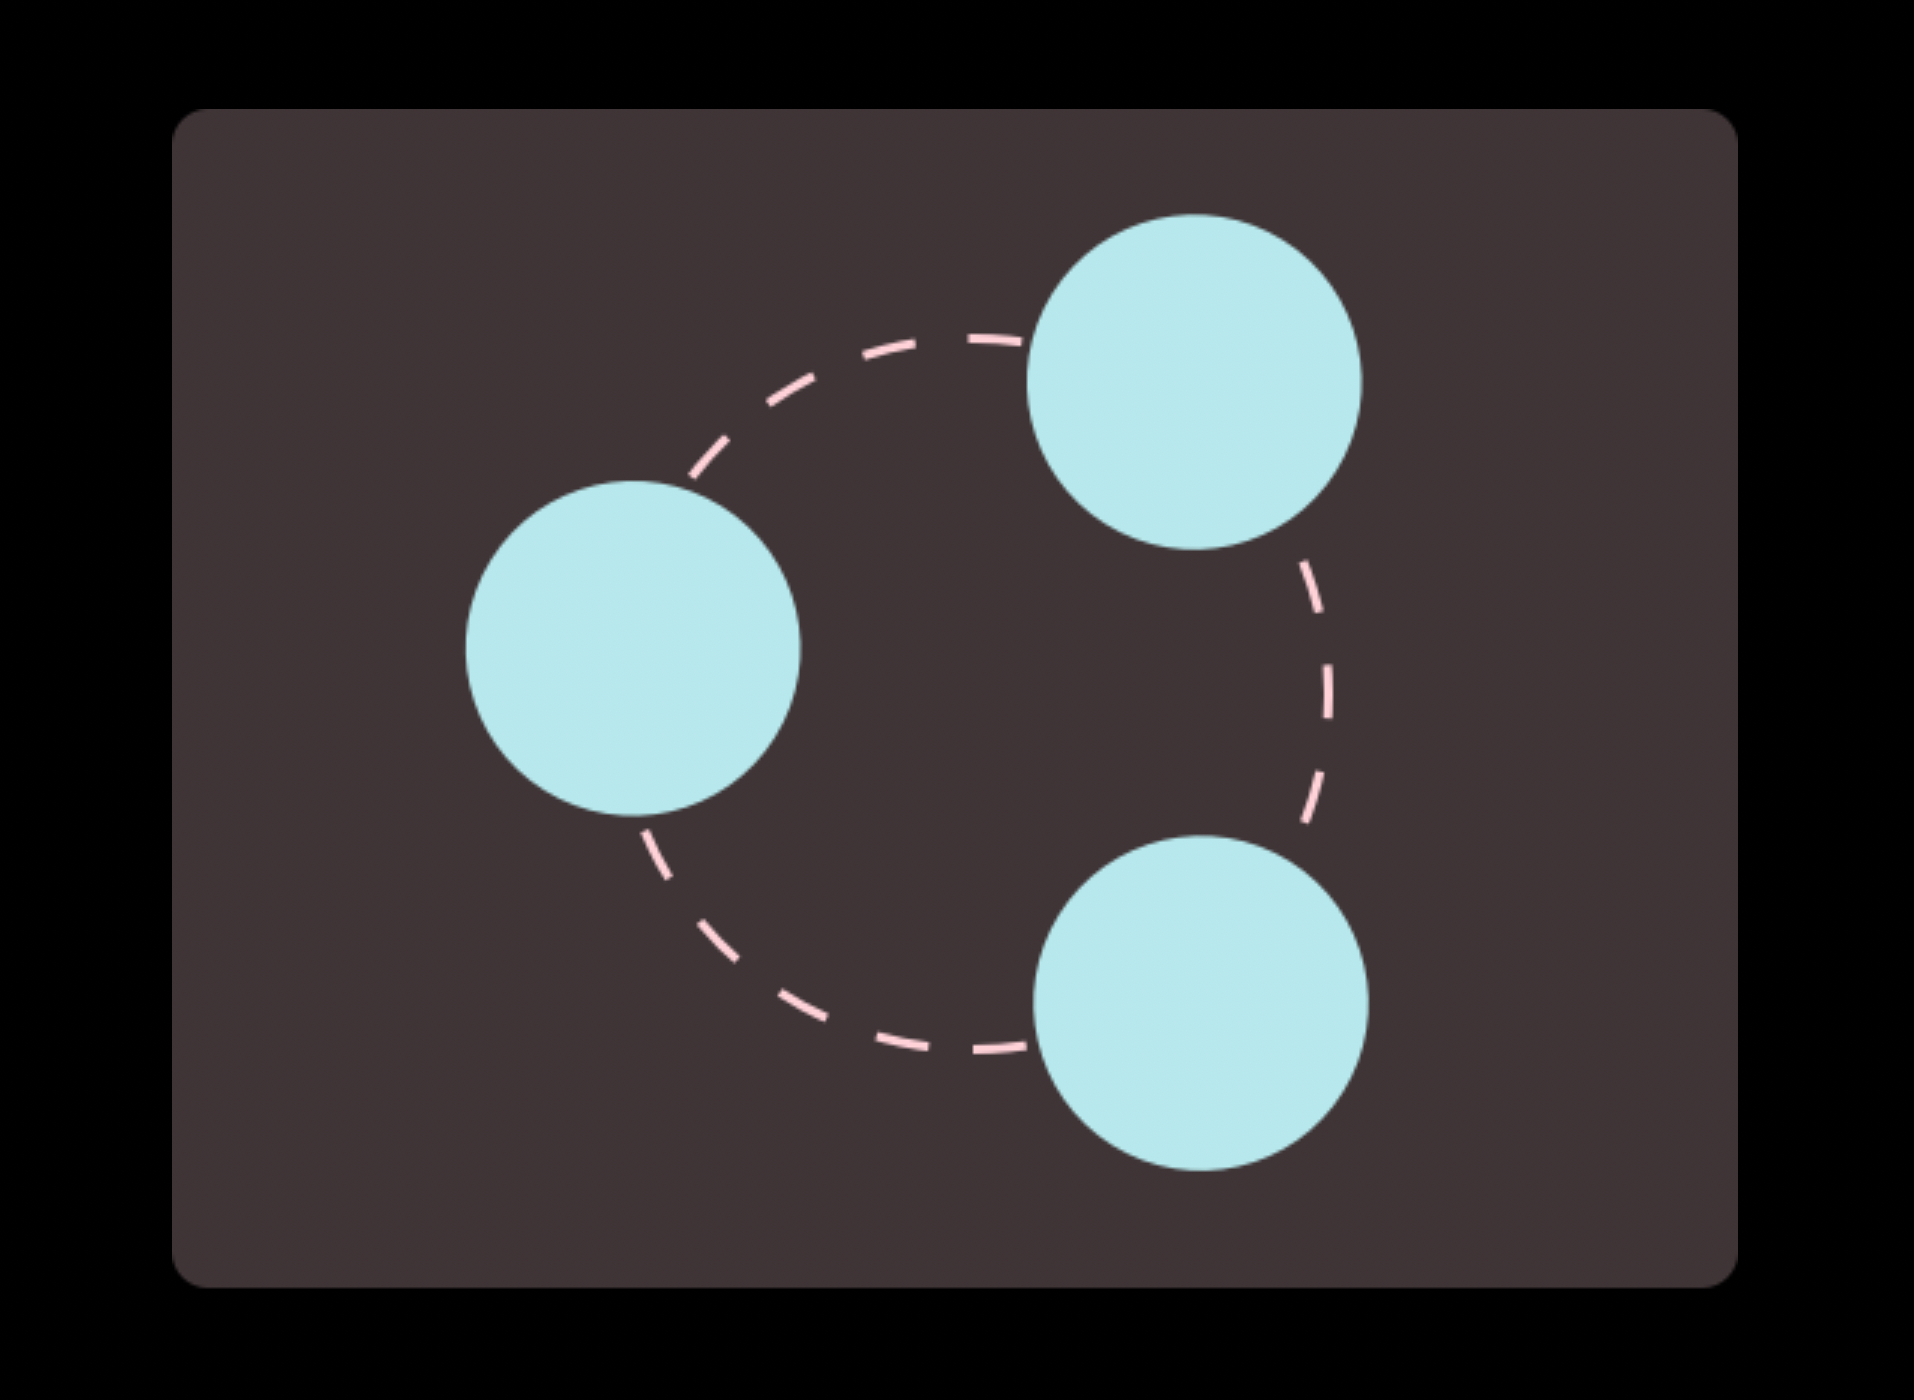
I believe that you see how powerful this tool is. For example, Apple creates a radial view in their example with Layout protocol.
So, it's only up to you how to place views inside your container and it's finally a room of flexibility so needed for SwiftUI in iOS 16.
Let me know what you think about it in the comments!